
Toyota Corolla Headlight And Taillight Replacement Guide
Are your Toyota Corolla’s headlights growing dim? Is one of them completely out? Are your taillights not working? No need to worry, they are pretty simple to change. Here is how to replace your headlight and taillights.

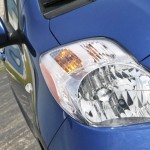
Have a headlight out on your Toyota Corolla? Get it fixed, here’s how.
Before you begin working on your Toyota Corolla make sure you have a well-lit location and an ample amount of time. Working in the dark or under a time crunch can lead to a botched repair. Also, remember to wear gloves since your skin’s oil can cause the new headlight to not last as long.
How To Install Headlights
In order to change your headlights, you will need to take a look at the headlight assembly under the hood. Toyota has made some changes to its design over the years, here is a general overview:
- Locate the headlight housing.
- Find any braces or coverings preventing your access to the rear of the assembly. Remove them.
- Look for wires feeding into the rear of the assembly. You should be able to feel a plastic housing for the bulb.
- Most headlight housings have a plastic tab that you grasp and then turn. This will free the bulb.
- Carefully replace the bulb by matching up the slot where the old one came out from.
- Insert the headlight housing back and twist the bulb back tight.
After you have replaced the bulb, it is a good idea to check to make sure it works AND look at your headlight alignment.
Here is just one of many ways to check the alignment.
- Park the Corolla approximately 20 feet away from a dark, vertical board or a garage door. Also, make sure it is on a relatively level surface. Lastly, push down on both sides of the car to make sure the suspension “resets.”
- Next, measure the distance from the ground to the headlight. Either draw or mark with masking tape a horizontal line across the board and/or garage door.
- Then, measure the distance between your headlights and mark that point.
- Turns on your headlights. Then, using the adjustment screws on the headlight assembly, adjust the lights until they shine on the masking tape and are an equal distance apart.
The rule of thumb is that you want your headlights to shine below the center and off to the right a bit.
How To Replace Taillights
In order to replace your taillights, the first step is to make sure you know which one is out. Often this means, someone told you or you will need someone to stand behind you while you turn on the lights and/or tap the brakes. Then, it is an easy process of buying the right bulb and replacing it.
For taillights:
- Locate the taillight bulb housing.
- Trace the wires to the right bulb.
- Remove the bulb and swap it out.
Pretty simple.
Hopefully, this guide solved your head/tail light bulb issue.
Related Posts
-
 Toyota Avalon Headlight And Taillight Replacement Guide
 -
 Toyota Yaris Maintenace: Headlight And Taillight Replacement
 -
 Toyota Sequoia Maintenace – Headlight Bulb/Assembly Replacement
 -
 Toyota FJ Cruiser Maintenance – Headlight Bulb Change And Assembly Removal
 -
 2002-06 Toyota Camry Maintenance – How To Change Headlight Bulb/Assembly
 -
 Toyota Tacoma Maintenance – Change Headlight Bulbs


