
Toyota Yaris Maintenace: Headlight And Taillight Replacement
Are the headlights and taillights not working and/or getting too dim on your Toyota Yaris? Not to worry, replacing them is pretty quick and easy. Here’s how.

Have a dimming headlight in your Toyota Yaris? Get it fixed, here’s how.
The best way to replace your headlight or taillight bulbs is to first find a suitable work area. You will want to find a well-lit and clean area to work in. Plus, make sure you have an ample amount of time to complete the job. These conditions will result in a much easier and better repair.
Lastly, before you begin, make sure you take proper precautions when handling the bulbs. The oil in your skin can cause the bulb to go bad quicker. In order to prevent that from happening, make sure you wear gloves.
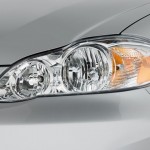
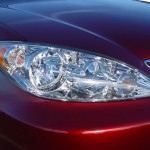
Replace Headlights
The first step to change your headlights is to first look for the headlight assembly under the hood. Specifically, look behind the headlight for wires connecting the bulb to electricity. Here is a general overview of how to change the bulb:
- Pop the hood and find the assembly behind the headlight. Look for wires that run into the headlight – your bulb is connected to those wires.
- Look for any braces and/or obstructions preventing you from replacing the bulb.
- Find a rubber boot and pull this off.
- Grasp the tabs that protrude from the rear of the headlight and twist to remove the bulb.
- While wearing gloves, gently remove the bulb and insert the new one.
- Reverse the process to put the bulb back in.
- Check the bulb by turning on your lights.
Headlight Alignment
A good idea after replacing the bulb is to check the alignment of your headlights. The Toyota Yaris has adjustable headlights which can move over time. There are many different ways to check your headlight alignment. Here is just one way:
- Park the Yaris approximately 20 feet away from a dark, vertical board and/or a garage door on a flat, level surface.
- Next, measure the distance from the ground to the headlight. Taking this measurement, go to the dark board or garage door and make it with either a marker or masking tape.
- Then, measure the distance between your headlights and mark the board or garage door.
- Finally, turn on your headlights. The lights should hit the masking tape and be equal distance apart.
Replace Taillights
Fortunately, taillights are pretty easy to change. Unfortunately, it is often hard to know when they are burned out.
In order to change out the taillights:
- Get a friend or park with the rear facing a dark surface. Then, test the taillights to determine which one/s are out.
- Open the trunk and locate the bulb housing behind the taillights. Twist or pull the light/s free.
- Replace the bulb and then recheck them to make sure they work.
Headlights and taillights that work properly are not only required for driving at night, it is safer driving with them. Hopefully, this guide helped you get yours working again.
Related Posts
-
 Toyota Avalon Headlight And Taillight Replacement Guide
 -
 Toyota Corolla Headlight And Taillight Replacement Guide
 -
 Toyota Sequoia Maintenace – Headlight Bulb/Assembly Replacement
 -
 2002-06 Toyota Camry Maintenance – How To Change Headlight Bulb/Assembly
 -
 Toyota FJ Cruiser Maintenance – Headlight Bulb Change And Assembly Removal
 -
 Toyota Maintenace – How To Clean Battery Cables/Terminals


