
How To Replace A Toyota Camry Ball Joint
Ball joints endure substantial wear and tear throughout their lifespan. Over time, the ball joint, boot, and lubricating grease will deteriorate. The longevity of ball joints depends on factors like vehicle mileage and the conditions in which they operate. If you're uncertain about the condition of your ball joints, read our blog post on how to diagnose a failing ball joint.
You should consider performing this repair yourself - all you need is a little automotive repair experience and the necessary tools. Below are the basic steps for ball joint replacement on a Toyota Camry. Keep in mind that these are the most basic repair steps. Please consult a vehicle-specific repair manual for more detailed instructions, including torque specifications.
Tools And Supplies Needed

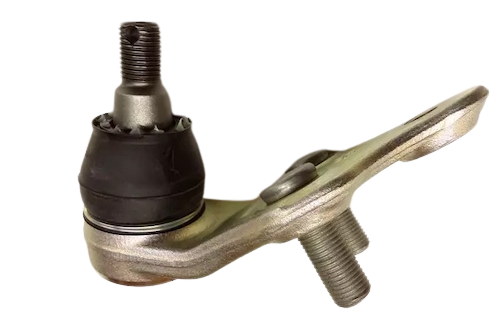
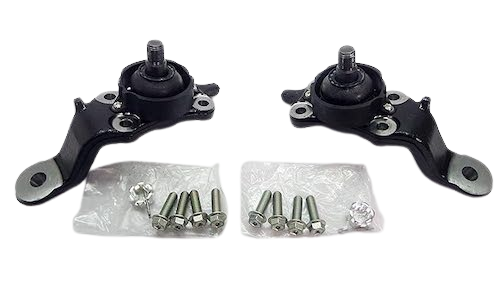
Image Credit: ToyotaMaintenance
- New OEM Toyota ball joints
- Floor jack/jack stands
- Pry bar and breaker bar
- Dead blow hammer
- Ball joint separator (optional but highly recommended)
- Ratchet
- 15mm through 19mm sockets and wrenches
- Torque wrench
- Needle-nose pliers and side-cutting pliers
- Wire brush
- Penetrating oil
Toyota Camry Ball Joint Replacement
Be sure to wear safety glasses for protection, and remember to set the parking brake and chock the wheels to prevent vehicle movement. The first part of the job is removing the old ball joints:
- Verify that the automatic transmission is in park or the manual transmission is in gear.
- Raise the vehicle and support it with jack stands.
- Remove the tire and wheel assembly.
- Spray the castle nut and ball joint stud with penetrating oil.
- Remove the cotter pin from the castle nut on the lower ball joint.
- Loosen the ball joint nut at the end of the ball joint stud with a wrench.
- Separate the ball joint from the steering knuckle with a ball joint separator. You can also use a pry bar by applying downward pressure between the axle and the ball joint nut.
- Loosen and remove the nuts securing the ball joint to the lower control arm.
- Remove the castle nut from the ball joint stud.
- Free the old ball joint assembly by gently prying downward on the lower control arm with a pry bar.
The next step is to install the new ball joints. Be sure to clean any rust and debris from the steering knuckle and lower control arm mounting points with a wire brush before installing the new parts:
- Place the new ball joint into position in the steering knuckle and lower control arm.
- Loosely install the ball joint castle nut and lower control arm mounting nuts.
- Tighten the ball joint castle nut and install a new cotter pin.
- Tighten the ball joint mounting nuts on the lower control arm.
- Reinstall the tire and wheel assembly.
- Torque wheel lug nuts to specification.
- Test drive the vehicle to verify the repairs.
Important Tips
- Always follow safety precautions, including eye protection.
- Vehicle age and corrosion may require further teardown to replace the ball joint successfully.
- Take pictures as you work to recall how the parts are installed.
- Keep parts and fasteners organized to ensure they go back in the right place.
- Learn more about ball joints and why they are important.
OEM Toyota ball joints include a minimum 12-month warranty from the date of purchase. Learn more about it in our Toyota Ball Joint Buyer's Guide (*link needed, new post). If you have questions about the proper ball joints for your Toyota, email us or give us a call.
Genuine OEM Ball Joints From Olathe Toyota Parts Center
Since 2007, the Toyota Parts Center has offered top-class online sales and services. We offer OEM Toyota parts at wholesale prices, backed by Toyota’s 12-month unlimited mileage warranty. If you need new ball joints for your Toyota, we've got ya covered.
Additionally, we offer other resources like a free Toyota VIN decoder and grille swap or engine swap guides. Contact us today if you need help finding ball joints for your Toyota.