

How To Replace the Alternator On A Toyota 2GR-FE V6
If the alternator taps out on your mid-2000s to 2010s 3.5L 2GR-FE V6 Toyota - think Avalon, Camry, RAV4, Highlander, or Sienna - don't be overwhelmed by the thought of replacing it. It's one of the more tedious maintenance tasks this engine requires, but totally doable.
The tight packaging in the engine bay can make getting the old part out and the new one in a frustrating puzzle with no shortcuts. Just remember that forcing components can lead to broken radiators and stretched hoses.
Let's join Toyota expert, The Car Care Nut for a walkthrough on a 2GR-FE alternator replacement the right way, and with your knuckles intact!
Why You Shouldn't Take the Shortcut
The primary hurdle with the 2GR-FE alternator is that once you unbolt it, there is almost zero room to maneuver it out of the engine bay. You may be tempted to unbolt the upper radiator support, pry the radiator forward, and squeeze the alternator through the gap. Avoid doing this.
Pulling on the radiator puts immense stress on the upper and lower hoses, as well as the plastic radiator end tanks. A momentary shortcut can result in a cracked radiator neck and a massive coolant leak down the road.
The Car Care Nut's method involves removing the radiator fan shroud to create the necessary clearance - a bit more tedious, but risk-free.
Step-by-Step: Toyota Alternator Removal
1. Prep the Bay and Drain the Coolant
To remove the fan shroud, you must first remove the upper radiator hose. This means draining the coolant is an unavoidable step.
- Disconnect the Battery: Always remove the negative battery terminal before touching alternator wiring to prevent short circuits.
- Drain the Radiator: Open the petcock at the bottom of the radiator (removing the radiator cap helps it drain faster) and let the coolant flow into a catch pan.
- Remove the Wheel: Jack up the front-right of the vehicle, secure it on stands, and remove the passenger-side front wheel. Removing the inner fender splash shield will give you the best access to the serpentine belt.
2. Lock the Drive Belt Tensioner
Toyota utilizes a brilliantly simple tensioner design on the 2GR-FE. Using a 14mm wrench, rotate the tensioner to relieve belt pressure. You will notice two alignment holes on the tensioner body; simply slide a spare bolt (like one from the fender shield) through the holes to lock the tensioner in the open position. This makes it much easier to pull the old belt off and route the new one!
3. Clear the Path
With the coolant drained and the belt off, it is time to make room.
- Remove the upper core support (the metal brace holding the hood latch and horns).
- Unbolt the hood latch and let it hang, and disconnect or reposition the horns.
- Detach the upper radiator hose from the radiator.
- Unplug the fan control module and carefully unclip and pull the fan shroud straight up and out of the engine bay.
4. Navigating the Alternator Bolts
The alternator is held in place by three primary fasteners: a long 14mm top bolt, a shorter 14mm bottom bolt, and a tricky 12mm bolt attached to a rear support bracket.
- Crucial Tip: Always remove the 12mm bracket bolt before pulling the final 14mm mounting bolt. If you leave the bracket bolted in and try to wiggle the alternator free, you will bend the bracket, making reassembly a nightmare.
- Once all three bolts are out and the electrical connector/B-terminal nut are removed, the alternator might still feel stuck. This is due to a small compression sleeve on the mounting point. Gently pry the alternator with a screwdriver to pop it past the sleeve, and lift it out through the space you created by removing the fan shroud.
Pro Tips: Toyota Alternator Install
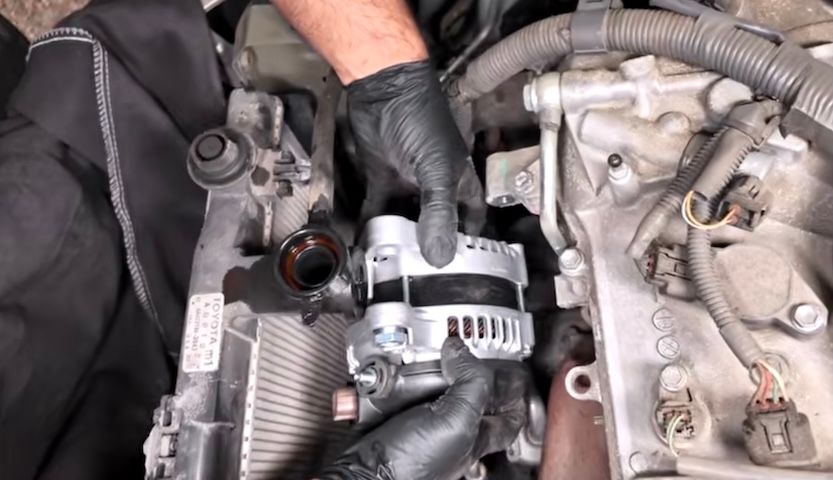
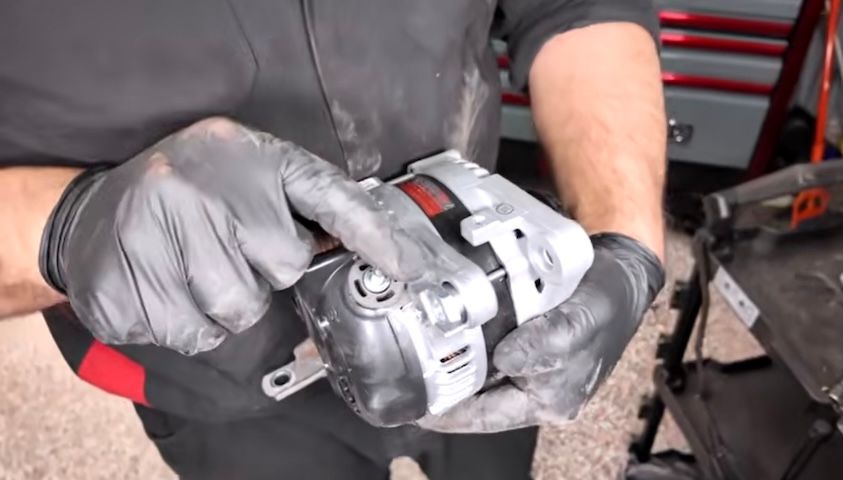
Image Credit: The CarCareNut
Installing the new unit is mostly the reverse of removal, but keeping a few best practices in mind will save you a headache later:
- Swap the Bracket: Don't throw your old alternator out immediately! You must transfer the rear metal bracket to your new alternator.
- Thread Everything First: When mounting the new alternator, thread all three bolts in loosely before tightening any of them down. Start with the tricky 12mm bracket bolt first so the bracket aligns perfectly without being under tension.
- Test the Hood Latch: After reinstalling the core support and the hood latch, use a screwdriver to manually engage the latch mechanism, then pull the cabin release lever to ensure it pops. Do this twice before actually closing your hood. If the cable became dislodged during the repair, you do not want to find out after the hood is securely shut.
Diagnosing A Failing 2GR Toyota Alternator
Sometimes, the first sign of a failing alternator on this engine isn't a battery light on the dash, but a rhythmic squeaking noise from the accessory drive, especially on cold starts.
This alternator model uses a one-way clutch pulley that can mimic the sound of a failing serpentine belt. To diagnose this, carefully spray a tiny amount of soapy water or silicone spray onto the ribbed side of the belt while the engine is running. If the squeak persists, the issue isn't the rubber belt - it's likely the alternator preparing for retirement.
Keep Your Toyota All Toyota
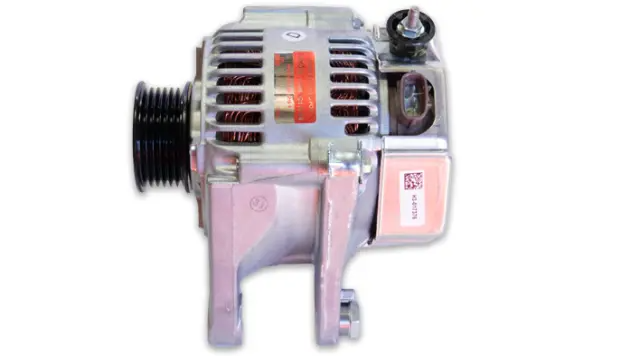
When undertaking a major maintenance project like this, the quality of your replacement parts determines your vehicle's reliability. Never gamble on cheap, big-box store aftermarket alternators or generic drive belts. Stick to genuine Toyota OEM alternators and serpentine belts.
Ready to get started on your 2GR-FE? We offer wholesale pricing on a massive inventory of genuine factory parts, ensuring your vehicle runs exactly as Toyota intended. Our handy VIN decoder ensures you get the right part, the first time. Let our decades of online sales experience help you with your DIY alternator replacement today.