

A Video Guide To Toyota Shock And Strut Replacement
Replacing your Toyota’s struts yourself can seem intimidating. Luckily our favorite YouTuber, the Car Care Nut is on hand to offer a step-by-step process for doing it in your own garage with just a handful of tools.
Toyota recommends replacing your struts every 50,000 miles or so. If your vehicle is wallowing over bumps or feels loose around corners, they should definitely be replaced.
If you don’t notice any of these issues, the Car Care Nut suggests looking for oil leaking down the side of the strut first. This is a sure sign that your strut is blown, and then it will definitely need replacement.
In this article we'll join the Car Care nut as he covers the process of replacing the front struts on a 2007 Toyota Corolla. It has a McPherson front suspension setup, which is common to most Toyota and Lexus models.
How To Remove Old Toyota Struts
As the Car Care Nut mentions, the replacement process is very similar across the Toyota model range, and these steps should also apply to your vehicle. Some of the equipment and tools you may need:
- Penetrating oil
- Ratchet set
- Torque wrench
- Spring clamps
- Car jack/Jack stands
Removal Steps
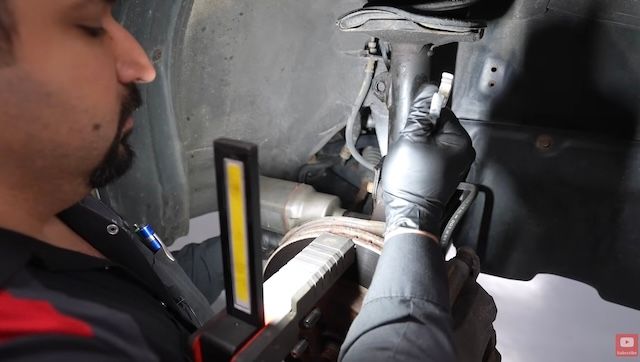
Image Credit: CarCareNut
- Jack up the front of the vehicle and remove the front tires
- Disconnect the sway bar – the hex nut may be rusted, so may need penetrating oil
- Remove the brake hose clamp. This gives the brake line some slack, so it won't get damaged.
- Remove the mounting bolt at the base of the strut. If it is a camber nut, mark the position of the camper with a scribe. The lower control arm will drop down a few inches when you remove the bolt. Use a car jack to control the motion.
- Turn the brake disc and knuckle to the side
- Open the hood to access the top strut mount nuts – some may be hidden behind a plastic cowling.
- Remove two strut mount nuts. Hold the strut with one hand while removing the third nut - this will prevent the strut from falling out.
The Corolla in the video has a free-floating top mount. This needs to be secured when loosening its nuts. Models like the Camry and Highlander have solid top mounts, which tend to stay in place when removing the nuts.
Once the mount is loose, it can be removed – if it is rusted in place, you may need to gently tap it with a hammer first.
Be very careful when removing the springs from the strut. They are under extreme tension and can pop out if not removed correctly. There are DIY spring compressors to do the job, but the Car Care Nut demonstrates how to do it on his dedicated strut removal machine. Do not attempt to remove the spring without spring compressors.
Once the spring has been securely clamped and the strut is loose, it’s time for the new parts to be fitted.
How To Install New OEM Toyota Struts
Have the following items ready:
- Replacement OEM Toyota struts
- One set of bump stops
- One set of rubber insulator boots or bellows
OEM Toyota struts are guaranteed to fit and function like the original parts and they come with everything you need for reinstallation.
“I always recommend you install Toyota struts, not aftermarket.”
- The Car Care Nut
The Car Care Nut always recommends using OEM parts. He suggests using reputable suppliers like Olathe Toyota Parts, where you can get genuine parts at wholesale prices.
Toyota Strut Installation Steps
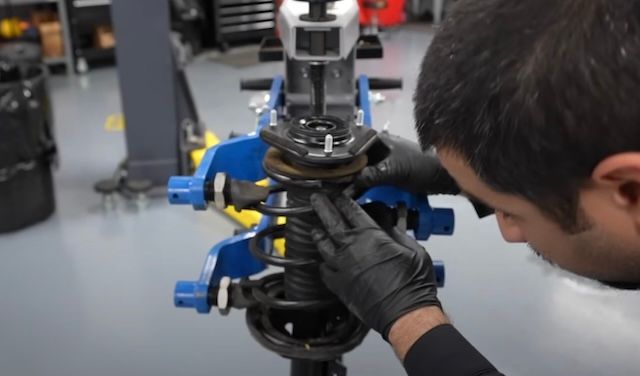
Image Credit: CarCareNut
- Toyota front struts are individual parts for the left and right side – match up the sway bar link mounts to ensure you fit the correct part to each side.
- Swap the rubber covers from the old struts.
- Replace your bump stops and insulators at the same time. They are cheap parts that will help your struts last longer.
- Make sure to align all the individual parts before reattaching the top mount.
- Use your spring clamps to decompress the spring slowly – ensure that all components are seated properly.
- Follow steps 1-7 in the removal section in reverse order to reinstall the struts.
Once the front struts have been replaced, you should do the alignment to ensure that the vehicle tracks straight.
Helpful Strut Replacement Tips
- Always replace your strut mounts when putting in new struts. Failing to do so can result in noises and bangs over bumps.
- The bump stops, and the rubber insulator boots (bellows) should also be replaced. They are inexpensive and will help your struts function properly and last longer.
- Toyota front struts almost always have a slightly different shape from left to right – buying OEM parts guarantees that you get the perfect fit every time.
- Always replace both front or rear struts at the same time. Replacing just one will detrimentally affect your ride quality and handling.
- Alignment always needs to be done once the front struts have been replaced.
- Body-on-frame trucks like the Sequoia and Tundra do not need front alignment to be done when their front struts are replaced.
Always Choose OEM Parts From Olathe Toyota Parts
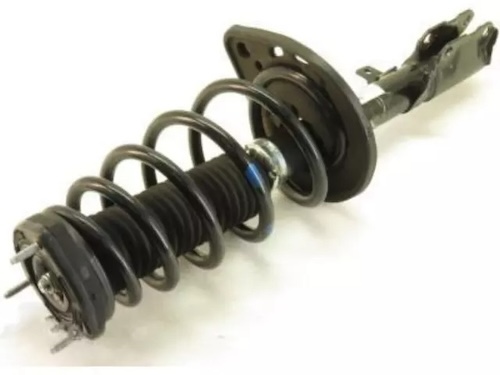
For all your genuine OEM Toyota and TRD Performance parts, Olathe Toyota Parts Center has you covered. As part of a Toyota dealership centrally located in Kansas City, we carry a huge supply of parts. We back every component we sell with a manufacturer warranty. And we ship quickly to both the East and West coasts. Some common suspension strut components we stock include:
Use our free online VIN lookup to ensure you're ordering the right suspension components, and order today.