
How To Replace Toyota Weatherstripping
You don’t need to be a body shop technician to be able to replace the weatherstripping on your Toyota. Replacing the weatherstripping is something pretty much anyone can do. You only need a pair of hands, perhaps a pair of pliers, and a good tutorial.
We put together this weatherstripping replacement tutorial for Toyota owners. If you have bad weatherstripping on your Toyota, this tutorial will help you replace weatherstripping. The Toyota Tacoma is the model on which this tutorial is based. The good news is the steps are pretty much the same across all Toyota models.
Ordering Replacement Weatherstrips For Your Toyota Model

The first thing you need to do is order the replacement weatherstrip(s) you need. It's important to order the correct weatherstrips made for your Toyota model. This way, you won't run into any fitment issues.
Do a search on your Toyota here. The search will yield a list of all the OEM weatherstrips available for your model. If you need help finding the right weatherstrip(s) for your car, please contact us. We'll be happy to help you!
As soon as you have the replacement weatherstrip(s) you need, follow the steps below to replace the weatherstripping.
How To Replace The Weatherstripping On Your Toyota
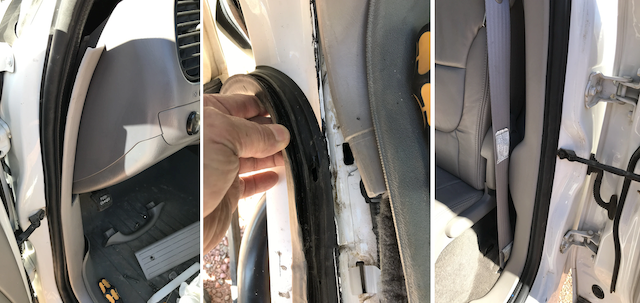
Image Credit: TundraSolutions
There's something you need to know before starting the replacement process. There may be weatherstripping clips and weatherstripping seals in place. Be sure not to break them when removing the weatherstripping. Also, be sure to align the clips and seals when installing the new weatherstripping.
The new weatherstripping will come with adhesive already on it. So you don't have to buy any type of adhesive.
Here's how to replace the weatherstripping on your Toyota:
1. Remove all the trim that will be in the way when you remove the weatherstripping. For example, on the 2001 Toyota Tacoma, the door sill plate is screwed in. You need to remove it to be able to remove the weatherstripping around the door frame. Look around and see if you need to remove any trim first.
2. Peel off the old weatherstripping. If there are any clips or seals in place, be careful not to break them off. If there aren't any indicators of where to put the clips or seals, you can use the old weatherstripping as a guide. While removing it, mark all the spots with a pencil. This way, you'll know where to line up the clips or seals on the new weatherstripping.
3. Remove any residual adhesive from the door frame with rubbing alcohol or another solvent.
4. Install the new weatherstripping. Run the weatherstrip along the edge and push it down to make sure that it stays on. (The sooner you make the weatherstrip flush with everything else, the easier it will be to install the rest of the strip.)
5. Reinstall the trim you removed in the first step, if applicable.
That's all! If you have any questions about replacing the weatherstripping on your Toyota, feel free to contact us.